Mods are a mechanism for players to change the gameplay of Galactic Civilizations III. A mod is distinguished from custom content, such as a custom faction or ship. Players can create and share custom factions, ships and flavor text from within Galactic Civilizations III itself, which supports Steam workshop integration. Mods enable players to add, remove or modify technologies, improvements, faction abilities, anomalies, AI behaviors, and many other aspects of the game.
Notable mods
User created mods are plentiful. This section attempts to highlight some of the more notable ones.
Using mods
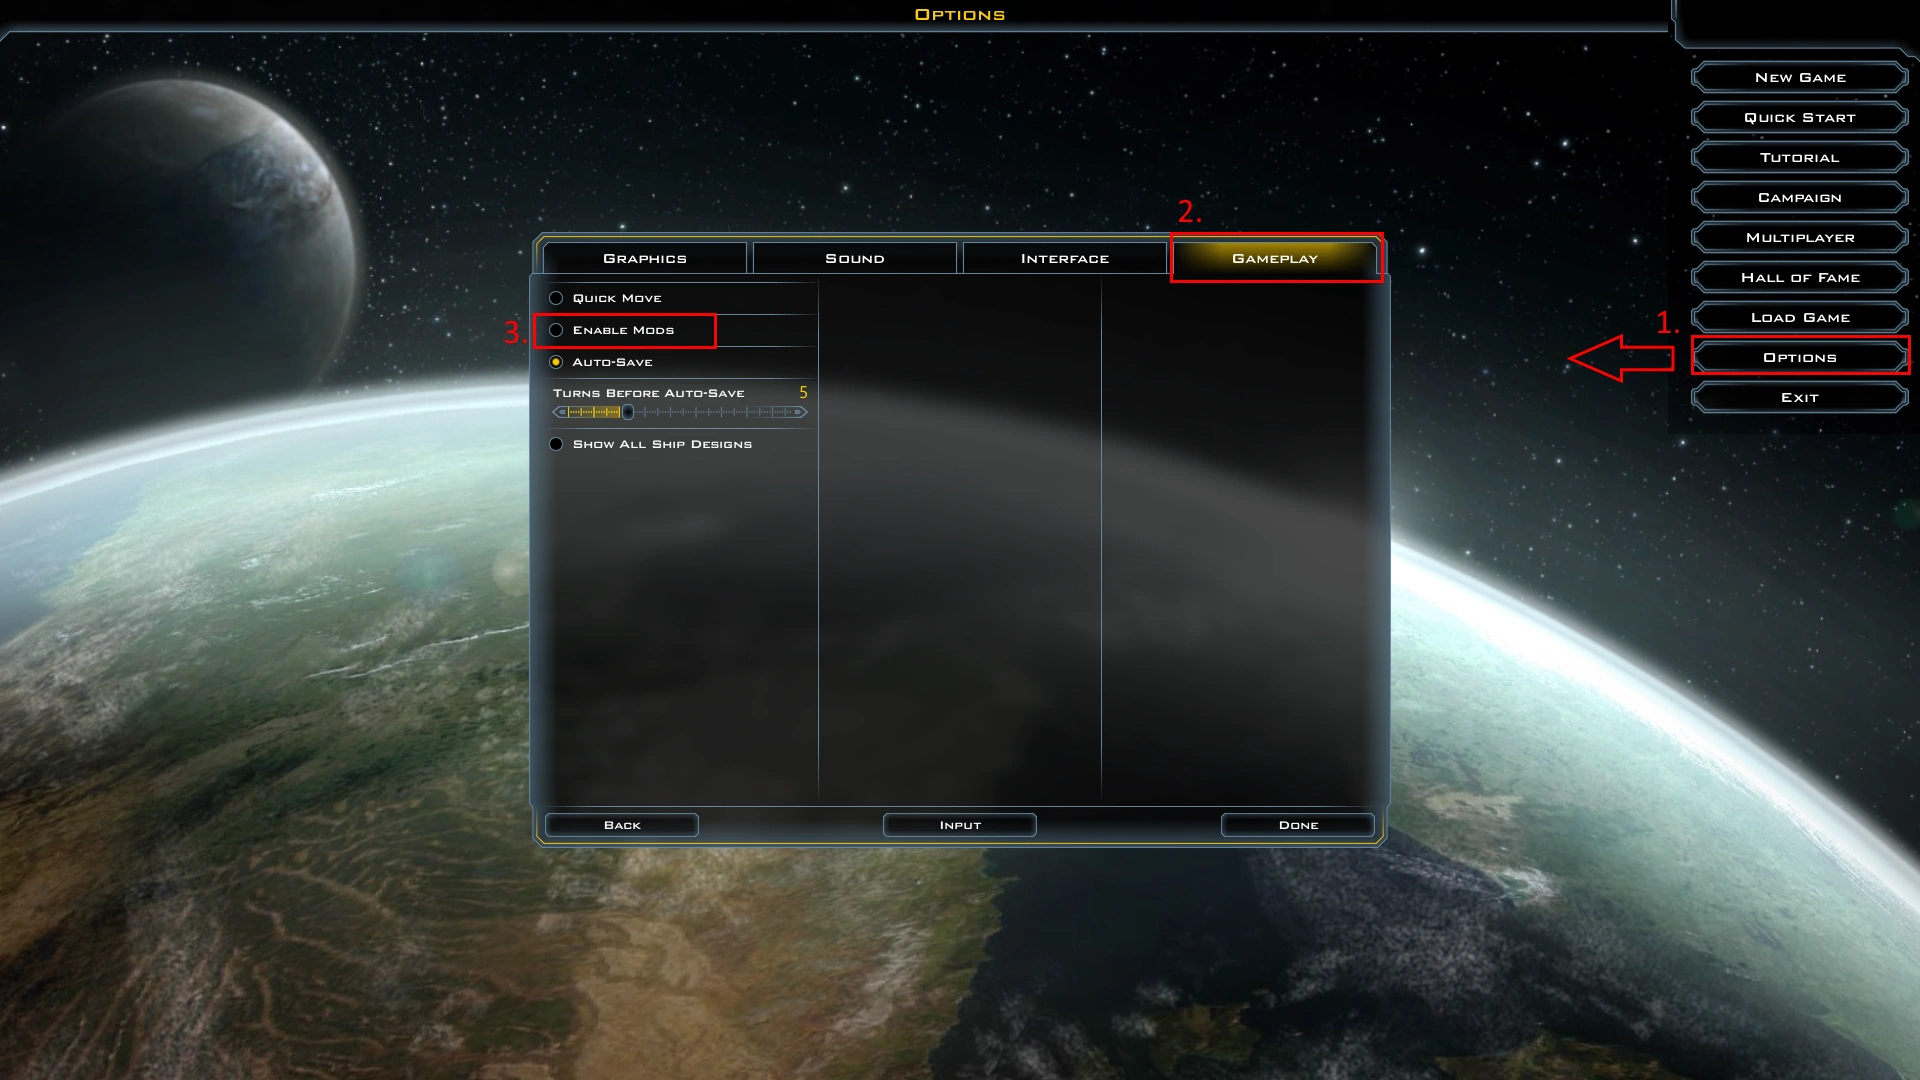
Enabling Mods
There are two ways:
- In the game options, click on Gameplay and select Enable Mods. You have to restart the game after changing this option.
- Within the Prefs.ini file located folder one up from Mods there is a line EnableMods=0, changing the value of this to "1" will enable mods.
Installation
To install a Mod, copy the modified files into the Mods folder. Many mods come as .zip or .rar file and need to be extracted to this folder.
Mods are placed in the %USERPROFILE%\My Documents\My Games\GalCiv3\Mods folder for the base game, or in the %USERPROFILE%\My Documents\My Games\GC3Crusade\Mods folder for the Crusade and Intrigue expansions.
Creating mods
Much of the content of GC3 is defined in editable XML files that can be changed or added to by user created mods. For official information from Stardock on modding see the ModdingReadme.txt file inside the Mods folder.
Required tools
First, you will need either an XML editor or a text editor.
At best you want an XML editor that is able to validate the XML for errors against an XML schema. Unlike GalCiv 2, for GalCiv 3 Stardock provides XML schema's, which allow you to see what changes are possible within the XML file. GalCiv 3 will crash if an XML is not valid, describing what does not validate with the XML schema.
- Notepad++: https://notepad-plus-plus.org/
- There is an xml plugin for it that includes syntax check and validation (both can be done automatically too) here: http://sourceforge.net/projects/npp-plugins/files/XML%20Tools/
- Sublime Text 3: http://www.sublimetext.com/3
- This IDE provides enough maneuverability around any type of project. Such as switching to the XML schema by copying the name from the second line of an XML file, pressing Ctrl+P, pasting it and picking from available options.
- The following package can be used to have validation of both XML and XML against the schema that has a relative location, you will also need SublimeLinter and xmllint: https://github.com/jtojnar/SublimeLinter-xmllint
Getting started
1) In your Mods folder is a textfile called "ModdingReadme". It's short, read it.
2) Either copy the ExampleMod folder (it's empty, only has folders) and rename it, or create the necessary folders manually (ParticleScriptDefs, Text, Core and Game)
3) Copy/paste the .xml files you wish to modify to the appropriate folder of your mod. Edit values.
Example mod:
This tiny modification sets the number of turns between trades with an AI player to 5.
File: \data\Game\GalCiv3GlobalDefs.xml goes into the mods Game folder
Changes:
- <AITradeCooldown>5</AITradeCooldown>
Testing Mods
Best way to test the overall gameplay of a mod is by using console commands, which can be enabled by adding the cheat launch option. Then in game use a command like 'soak' to have AI take over control of the race you previously controlled.
Debugging Mods
Sometimes the game may crash after you've made some changes and you have no idea what is at fault. You may check the debug.err file in the folder one up from Mods. Either look at the end of the file for the error or before crash information dump part.
If there is nothing unusual there, you can increase the output debug information by using these values for Debug* options within the Prefs.ini file:
- The valid values are:
- Default
- DebugOnly
- VerboseDebug
- Spam
- I hope that this helps, but it really depends on how much debug messages we've added to a various system. Also, FYI, the debug messages slow down the game, so a higher volume will cause your game to run slower, so make sure to set them back to default when you're done. You will probably want to set the Data, Inititalization, and Engine categories to Spam if your problem occurs during load.
- - Stardock Programmer Cari